Step 1:
To create a box we will use the height and width functions. These functions can be applied to all HTML elements except non-replaced inline elements. We will also apply color in this step as it will allow us to see the box we have created. We will use a div to create our box.
Using fixed height and width.
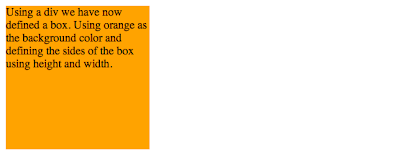
<div style="background-color: orange; height: 200px; width: 200px;">Using a div we have now defined a box. Using orange as the background color and defined the sides of the box using height and width.
</div>
The result is this.

Step 2:
We can now define the box to have max-widths and max-heights or min-widths and min-heights.
<div style="background-color: orange; max-height: 200px; max-width: 200px;">The max-height and max-width tool allow the box to bound the text better, but will not allow width or height to exceed the defined amount.</div>
The result is this.

Step 3:
We can also define the box to have min-heights and min-widths.
<div style="background-color: orange; min-height: 200px; min-width: 200px;">The min-height and min-width tool tell the box that it cannot be smaller than the defined amount.</div>
The result is this.
Step 4:
Now that we know how to create a box and define its size we can learn how to position the box on the page using relative positioning.
<div style="position: relative; left: 100px; background-color: orange; height: 75px; width: 100px;">This box has relative positioning.</div>
The result is this.

Other elements are not effected by this positioning which can cause overlapping.
Step 5:
There are other types of positioning as well; absolute and fixed. Fixed positioning allows the box to be fixed on the page. In other words the box will remain in one place as the remainder of the page is allowed to scroll.

No comments:
Post a Comment